
The Story
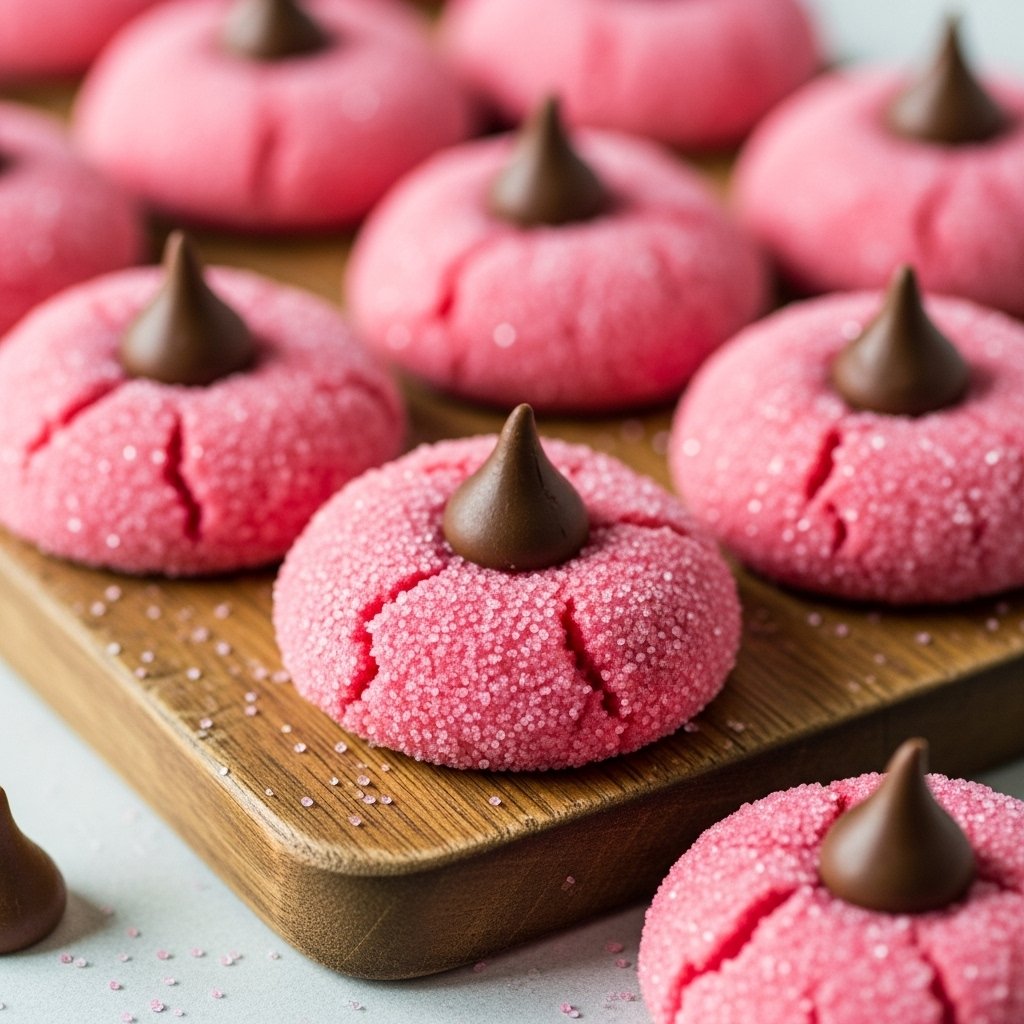
The first time I saw a plate of pink cookies, I was instantly charmed. It was Valentine’s Day, and my friend had whipped up a batch of these Strawberry Kiss Cookies. They looked like little pink clouds topped with a chocolate gem. One bite, and I was hooked—they were incredibly soft, bursting with berry flavor, and the chocolate center was the perfect rich contrast. I couldn’t believe they started with a simple box of cake mix. It felt like a huge discovery to find a recipe that delivered such a spectacular result with so little effort. Now, these cookies are my go-to for sweet cravings, bridal showers, or just brightening up a dreary Tuesday. They are pure joy in cookie form.
Why Strawberry Kiss Cookies Are a Must-Bake
The Secret to a Soft, Chewy Texture
The magic ingredient here is cream cheese. While standard cake mix cookies often use just oil and eggs, adding softened cream cheese transforms the texture entirely. It creates a dense, fudgy consistency that is more like a brownie than a cake. This richness ensures the cookies stay soft for days, rather than drying out. The melted butter adds a luxurious flavor that oil simply can’t match. It’s a simple swap that yields a massive improvement in taste and mouthfeel. This technique is a proven winner for achieving that bakery-style chewiness at home.
Choosing the Right Cake Mix
Not all strawberry cake mixes are created equal. You want to look for one that promises a “moist” or “pudding-in-the-mix” result. Brands like Betty Crocker or Duncan Hines work beautifully. The flavor intensity varies, so if you want a bolder strawberry punch, you can add a drop of strawberry extract, though the mix usually has plenty of flavor on its own. The pink hue is also key; some mixes are paler than others. If you want a truly eye-popping color, a tiny drop of red food coloring can help, but the natural pink of the batter is usually lovely and appealing enough.
Creating the Strawberry Cookie Dough
Incorporating Cream Cheese for Richness
The cream cheese acts as a binder and a flavor enhancer. It adds a subtle tang that cuts through the sweetness of the cake mix, creating a more balanced flavor profile. This richness is what makes these cookies feel decadent rather than just sweet. When you mix it in, the dough will become quite sticky and heavy. This density is exactly what you want; it means your cookies will have substance. Don’t be tempted to add liquid; the moisture from the cheese, butter, and egg is sufficient. Trust the process, and you will be rewarded with a spectacular texture.
Why Chilling the Dough Is Non-Negotiable
You simply cannot skip the chilling step. Because we use melted butter and cream cheese, the dough is very soft and sticky right after mixing. If you baked it immediately, the cookies would spread into flat, thin puddles. Chilling the dough in the refrigerator for at least one hour allows the fats to solidify again. This rest period ensures the cookies bake up thick and puffy, holding their shape perfectly. It also makes the dough much easier to handle when you roll it into balls. Patience here is vital for a professional result. It’s the difference between a fail and a success.

Strawberry Kiss Cookies
Ingredients
- 1 box 15.25 oz strawberry cake mix
- 8 tablespoons 1/2 cup butter, melted and slightly cooled
- 1 large egg
- 4 ounces cream cheese softened
- Optional: powdered sugar or pink granulated sugar
- 30 chocolate Hershey’s Kisses unwrapped
Instructions
- Combine strawberry cake mix, melted butter, and egg in a large bowl until smooth.
- Add softened cream cheese and mix until thick and fully incorporated.
- Cover dough and refrigerate for at least 1 hour.
- Preheat oven to 350°F and line baking sheets with parchment paper.
- Scoop dough into tablespoon-sized balls.
- Roll in powdered sugar or pink sugar if using, or place plain on baking sheet.
- Bake for 8–10 minutes until edges are set but centers are soft.
- Rest cookies 1–2 minutes, then gently press a chocolate kiss into the center.
- Transfer to a wire rack and cool completely.
Notes
Baking Your Strawberry Kisses to Perfection
Rolling and Sugaring for Extra Sparkle
Before baking, you have the option to roll the dough balls in sugar. This isn’t just for decoration; it adds a lovely textural contrast. Powdered sugar creates a snowy, crinkle-cookie effect that looks beautiful against the pink dough. Alternatively, pink granulated sugar adds a monochromatic sparkle and a satisfying crunch. Simply toss the ball in a small bowl of your chosen sugar until fully coated. If you prefer a smoother look, you can skip this step, but the sugar coating elevates the presentation from simple to spectacular. It makes them look like they came from a fancy bakery.
Timing the Bake for Soft Centers
Baking these cookies requires a watchful eye. They need only 8 to 10 minutes in the oven. You are looking for the edges to look set and dry, while the centers remain soft and slightly underbaked. Do not wait for them to brown! If they brown, they will be dry and crunchy instead of soft and chewy. Overbaking is the enemy of a terrific Strawberry Kiss Cookie. Trust that they will continue to firm up as they cool on the baking sheet. Pulling them out at the exact right moment is the secret to that melt-in-your-mouth texture that makes everyone ask for the recipe.
Adding the Chocolate Kiss Center
The Perfect Press Technique
Gently press a chocolate kiss into the center of each warm cookie. You don’t need to push it all the way through; just press down until the cookie cracks slightly around the edges. These cracks are normal and actually add to the charm of the appearance. The heat from the cookie will soften the chocolate, so be careful not to touch the tip of the kiss, or it will lose its shape. If you press too hard, the cookie might split, so use a gentle hand. This step transforms a simple round cookie into an iconic treat that feels like a special gift.
Cooling and Storing Tips
After placing the kisses, transfer the cookies to a wire rack to cool completely. This is vital because the chocolate needs time to firm up again. If you try to stack them while warm, the chocolate will smudge and make a mess. For storage, keep them in an airtight container at room temperature. They stay soft and delicious for up to 3 days. If you need to stack them, place a sheet of wax paper between layers to protect the chocolate tips. These Strawberry Kiss Cookies actually taste even better the next day as the flavors meld, making them perfect for making ahead.
Frequently Asked Questions
Can I use a different flavor of cake mix?
Absolutely! This recipe is incredibly versatile. You can use lemon cake mix for a citrus twist, red velvet for a deeper color and cocoa flavor, or even chocolate cake mix for a double-chocolate treat. Just keep the other ingredients the same.
Why did my cookies spread too much?
Spreading usually happens if the dough wasn’t chilled long enough or if the butter was too hot when mixing. Make sure to chill the dough for at least an hour. Also, avoid placing cold dough on a hot baking sheet; let the sheet cool between batches.
Can I freeze these cookies?
Yes, you can freeze the baked cookies. It is best to freeze them without the chocolate kiss if possible, as the chocolate can bloom (turn white) in the freezer. However, if they are already made, freeze them in a single layer first, then stack with wax paper. Thaw at room temperature.
Do I have to use Hershey’s Kisses?
No, you can get creative with the center. Chocolate hearts, white chocolate drops, or even a chocolate ganache thumbprint filling would work well. The kiss is classic, but feel free to customize it to your taste.
Conclusion
Strawberry Kiss Cookies are the perfect example of how simple ingredients can come together to create something truly magical. With their vibrant color, soft texture, and sweet chocolate center, they are a joy to bake and eat. Whether you are a beginner baker or a pro looking for a quick fix, this recipe delivers amazing results every time. So grab that box of cake mix and get ready to spread some love with these delightful pink treats. They are sure to become a new favorite in your home!